
Mechanical polishing creates a smooth, mirror-like finish on metal components, essential for functionality, durability, and safety. This guide covers the tools, techniques, and tips needed to achieve high-quality results, adjust for different materials, and understand the importance of skilled fabricators in the process.
What is Mechanical Polishing?
Mechanical polishing is a finishing process that uses friction and abrasion to smooth a workpiece’s surface. The goal is to remove or reduce surface imperfections like scratches, pits, and burrs, resulting in a cleaner, more reflective, and often more resilient finish. This is achieved by progressively using finer abrasive materials to grind down microscopic peaks and valleys on the material’s surface until the desired level of smoothness is reached.
The importance of this process in manufacturing cannot be overstated. In medical devices, a smooth surface is easier to sterilize and less likely to harbor bacteria. In aerospace, polished components can reduce friction and improve aerodynamic performance. For consumer electronics, a polished finish adds a premium feel and aesthetic appeal.
Essential Tools for Mechanical Polishing
Achieving a professional polish requires the right set of tools. While the specific equipment can vary based on the project’s scale and material, some core tools are fundamental to the process.
Grinders and Sanders
The initial stages of polishing often involve removing significant surface material or large imperfections.
- Angle Grinders: These are powerful handheld tools used for aggressive material removal and shaping. They are typically fitted with grinding discs or flap wheels for initial surface preparation.
- Belt Sanders: Available in both handheld and benchtop models, belt sanders use a continuous loop of sandpaper to quickly smooth flat surfaces.
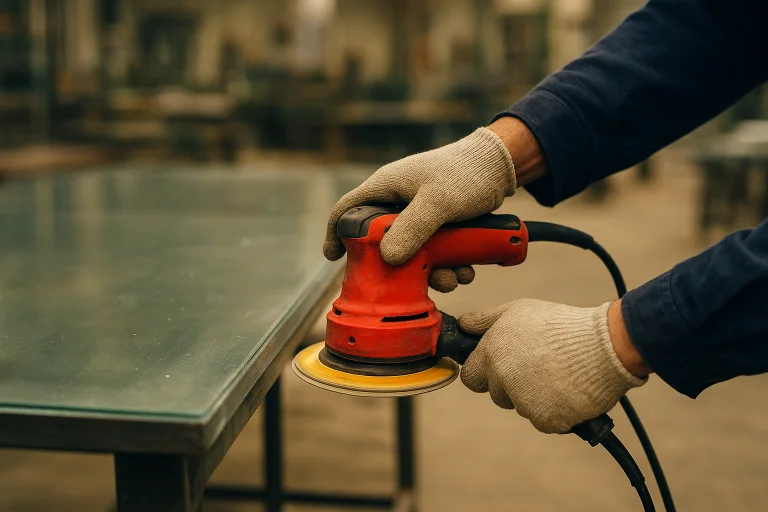
- Orbital Sanders: These tools are less aggressive than grinders or belt sanders, using a random oscillating motion to create a finer, swirl-free finish, making them ideal for pre-polishing stages.
Polishing Machines and Buffing Wheels
Once the surface is prepared, specialized polishing tools take over.
- Bench Grinders/Polishers: These stationary machines are equipped with buffing wheels. They provide the power and stability needed for polishing small to medium-sized parts consistently.
- Buffing Wheels: These are the heart of the polishing process. They come in various materials, including cotton, sisal, felt, and flannel. The choice of wheel depends on the polishing stage; for example, sisal is coarse and used for initial cutting, while flannel is soft and used for final high-gloss finishing.
Polishing Compounds
Polishing compounds are abrasive pastes or bars applied to the buffing wheel. They contain fine abrasive particles suspended in a binder (like grease or wax). These compounds are color-coded to indicate their level of abrasiveness, ranging from coarse compounds for cutting and removing scratches to fine compounds for bringing out a mirror shine.
Techniques for Effective Mechanical Polishing
Polishing is a multi-step process that requires patience and precision. Following a systematic approach ensures the best results.
Step 1: Surface Preparation
Before any polishing begins, the surface must be clean and free of dirt, oil, or grease. Any contaminants can get embedded into the material during polishing, ruining the finish. After cleaning, the initial step is to remove any deep scratches or blemishes using a coarse abrasive, such as a grinding wheel or low-grit sandpaper (e.g., 180-220 grit). The goal is to create a uniform, matte surface.
Step 2: Progressive Sanding
Next, you will move through progressively finer grits of sandpaper. For example, you might move from 220 grit to 320, then 400, and up to 600 or higher. With each new grit, sand in a direction perpendicular to the previous step. This helps remove the scratch pattern from the coarser grit. Continue this process until the surface has a smooth, satin-like appearance with no visible scratches.
Step 3: Cutting and Buffing
Now it’s time to use a buffing wheel and a coarse polishing compound (often called a “cutting” compound). Apply the compound to the spinning wheel and press the workpiece against it with firm, even pressure. Move the workpiece constantly to avoid overheating any single spot. This stage removes the fine sanding marks and begins to develop a shine.
Step 4: Final Polishing
After the cutting stage, switch to a softer buffing wheel and a finer polishing compound. This step, known as “coloring” or “finishing,” removes the faint lines left by the cutting compound and brings out a deep, brilliant, mirror-like shine. Use light pressure and clean the workpiece frequently to inspect your progress.
Tips for a Perfectly Smooth Finish
- Cleanliness is Key: Always work in a clean environment. Use separate buffing wheels for different compounds to avoid cross-contamination.
- Control Heat Buildup: Excessive heat can discolor or warp the material, especially with metals like stainless steel and aluminum. Use light pressure and keep the workpiece moving.
- Mind Your Speed: The speed of the polisher (RPM) affects the outcome. Higher speeds are generally used for cutting, while lower speeds are better for final finishing.
- Safety First: Wear appropriate personal protective equipment (PPE), including safety glasses or a face shield, gloves, and a dust mask or respirator.
Polishing Different Metals and Alloys
Different materials react differently to polishing. Tailoring your technique is essential for success.
- Stainless Steel: This material is hard and requires more aggressive compounds and firm pressure. It is also prone to heat discoloration, so careful temperature management is vital.
- Aluminum: Being a softer metal, aluminum polishes quickly but can also be easily damaged. Use lighter pressure and compounds specifically designed for soft metals to avoid gouging.
- Brass and Copper: These metals polish beautifully but tarnish easily. After achieving the final polish, it’s wise to apply a protective clear coat or wax to preserve the shine.
- Titanium: Extremely hard and durable, titanium requires specialized diamond or carbide-based compounds and significant effort to polish effectively.
The Role of Sheet Metal Fabricators
While DIY polishing is possible for smaller projects, achieving industrial-grade finishes on complex parts requires expertise. Professional sheet metal fabricators have the specialized equipment, controlled environments, and deep knowledge necessary to produce consistent, high-quality results. They understand the nuances of different materials and can execute advanced techniques, including those for precision components that might require a surface plate lapping service for ultimate flatness and finish. Partnering with a skilled fabricator ensures that components meet exact specifications for smoothness, reflectivity, and dimensional accuracy, saving time and guaranteeing a professional outcome.
Conclusion
Mechanical polishing isn’t just about aesthetics—it improves a product’s performance, durability, and value. By using the right tools, techniques, and understanding material properties, polishing combines science and artistry to achieve flawless results. For high-precision needs, professional fabricators deliver superior and consistent finishes.